
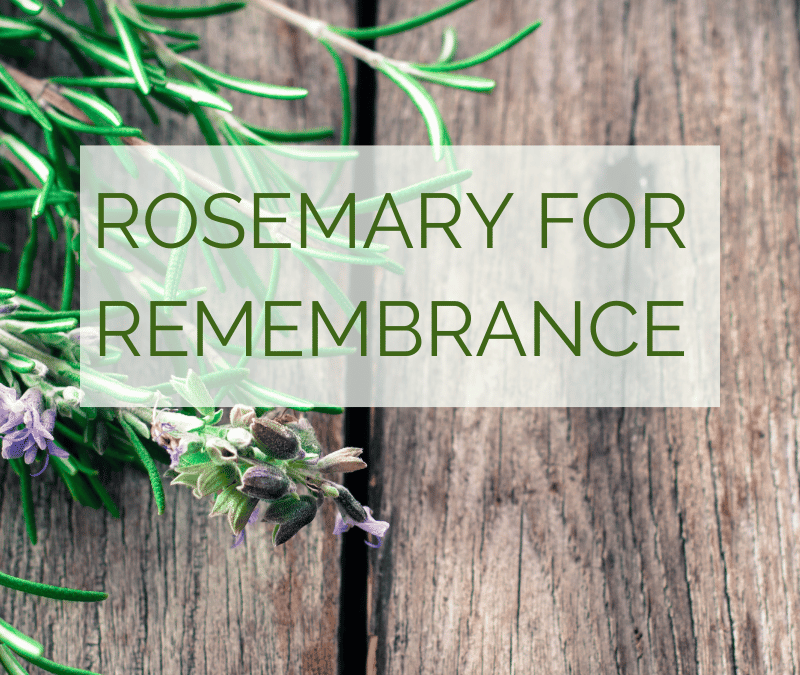
Rosemary for Remembrance
Remembrance of Rosemary
Who doesn’t love the piney scent of rosemary? Aromatic rosemary has been a beloved culinary herb since ancient times. Its integrative medicinal and spiritual uses may be less well known, yet are certainly just as compelling. Rosemary helps you remember – in every dimension from your body to your soul – who you are and your place in the web of nature and life.
This post takes you on a journey of remembrance – of rosemary’s ancient wisdom, modern science, and everyday uses of this health-enhancing herb.
What a delight to take a fragrant journey into remembrance of rosemary! Thank you for joining me. This article will unveil rosemary’s nutritional science and medicinal potential, explore its culinary uses, and uncover some of its historical and spiritual significance.
Medicinal Uses of Rosemary
Rosemary for Cognitive Health
Rosemary is the fragrance of memory. Scientific studies suggest rosemary’s aromatic compounds can be protective of both your body’s and your brain’s neurophysiology. Intriguingly, the origins of the phrase “Rosemary for Remembrance” are rooted in the herb’s historical role in enhancing memory and concentration. Ancient cultures revered rosemary for its ability to stimulate mental clarity and sharpen recall, a belief that modern nutritional science would say has stood the test of time.
Rosemary contains carnosic acid (CA) and carnosol (CS), abietane-type phenolic diterpenes. These compounds have been shown to act as neuroprotective agents in people with Alzheimer’s Disease, Parkinson’s Disease, and in people struggling with long-term COVID. That neuroprotective action is mostly due to CA and CS’s anti-inflammatory and anti-oxidant action in some key neural pathways. In the case of CA, its action appears to occur both systemically (throughout your body). It also crosses the blood-brain barrier to act on the neurobiology of the brain.
Anti-Inflammatory and Antioxidant Benefits
Beyond its culinary appeal, rosemary holds an arsenal in the fight against inflammation and oxidative stress. Inflammation occurs when your body causes an immune response – usually in response to an injury or infection. Under usual conditions, inflammation is the helpful first stage of healing. The problem is when the inflammatory response gets over-activated, which can happen when the body simply doesn’t recognize what it’s being exposed to (think about the synthetic chemicals in hyper-processed foods, low-quality supplements, medications and even cleaning products).
Oxidative stress is a normal byproduct of metabolism and happens all the time. The process of oxidation creates free radicals, which are highly-oxygenated (and highly reactive) molecules. Free radicals are natural but in high amounts can cause damage to your organs and tissues. This is where anti-oxidants come in. Found widely in colorful fruits and vegetables, anti-oxidants are like free radical vacuum cleaners. They help maintain a healthful balance of nutrients and free radicals, preventing oxidative stress. Rosmarinic acid, a polyphenolic compound found abundantly in rosemary, is a powerful defender against cellular damage that can begin the over-activated process of inflammation and that also acts as a powerful antioxidant.
Digestive Aid and Immune Support
As our journey continues, feel rosemary’s gentle aid to your digestive system and immune defenses. Whether it’s sipping a comforting cup of rosemary-infused tea or savoring dishes with its aromatic essence, rosemary’s soothing touch has been recognized for its potential to promote digestion and bolster immunity.
A 2022 study of rosemary’s essential oil found it effective against candida albicans, a common strain of yeast often found to be a culprit in small intestinal bacterial overgrowth (SIBO) or an overgrowth of yeast in the digestive tract or other areas.
Folk Herbal Uses of Rosemary
Rosemary holds a cherished place in the wisdom traditions of your herbalist forebearers. From easing respiratory or muscular discomfort, rosemary’s use spans many cultures and generations. It well may be that your ancestors observed what this fragrant herb can do – what today you’d call its anti-inflammatory, antioxidant, or anti-microbial benefits.
Take a deep breath and know that rosemary has long been used for respiratory well-being. From ancient steam inhalations for tired or weakened lungs, to time-tested herbal remedies that help ease congestion, rosemary is one of nature’s respiratory allies.
Do you have a creaky joint or aching muscles? Rosemary just might come to the rescue. Traditional liniments and infused oils often include soothing rosemary to ease those discomforts.
Ever dreamed of radiant beauty? Rosemary’s historical skincare and haircare secrets. Armed with simple yet effective homemade recipes, and a few well-chosen supplements, you just may embark on a journey toward that coveted glow.

Metaphysical and Symbolic Significance
Beyond the realms of tangible science, rosemary has profound spiritual and energetic properties.
Purification and Protection
In the midst of life’s whirlwind, rosemary is an ever-watchful protector of sacred spaces. Like an energetic sentinel, rosemary acts as an invisible shield against negative energies. Its aromatic molecules are thought to interact with the vibrational frequencies of the environment, creating a protective barrier that repels discordant energies and ushers in a sense of purity.
Used in rituals and practices that tap into the deep remembrance that rosemary holds, you just might find yourself enveloped in her aura of cleansing and rejuvenation, in a harmonizing dance between its energetic field and your own.
Enhancing Intuition and Mental Clarity
Close your eyes with the intention to remember, and feel the gentle stirrings within. With rosemary, you could embark on a quest to awaken forgotten depths of your mind. But how does it foster such a profound connection to our inner wisdom? The answer lies in rosemary’s unique energy signature or vibrational resonance.
Rosemary’s vibrations resonate with the frequencies of heightened awareness, acting as a conduit to the deeper recesses of your consciousness. Through meditation and spiritual practices, the energetic resonance of rosemary can align your mental faculties, allowing you to tap into your intuitive capacities with greater clarity. The result is a harmonious synchronization between your spiritual essence and the profound energy emitted by rosemary.
Rosemary for Remembrance, indeed!
Rosemary for Remembrance and Memory
As we travel the tapestry of rosemary’s history and tradition, can you feel the threads of rosemary’s symbolism in remembrance and memory gently unfurl? If you do, you are experiencing an evocation of some powerful associations. If not, patience and practice may get you there. Keep practicing.
But how does rosemary evoke deep remembrance? Once again, the answer lies in rosemary’s energetic mechanism. Its vibrations are thought to possess an ability to resonate with the energy of memory and reverence. This resonance creates a bridge between the physical and energetic realms, infusing ceremonies and celebrations with an air of nostalgia and honoring. Whether it graces solemn ceremonies or joyous celebrations, rosemary’s essence transcends the boundaries of time, becoming a potent emblem of honoring the past and celebrating the present, all brought to life through its energetic alchemy.
How to Use the Herb Rosemary
Culinary Use: Tips & Cautions
We all know the familiar flavor and aroma of rosemary. In the kitchen, it introduces a dimension of depth and warmth to savory soups or richens the flavor of traditional stews.
Tips on Culinary Use of Rosemary
To wield rosemary’s culinary magic with finesse, here are a few tips from my kitchen to yours:
- Fresh or Dried: Both fresh and dried rosemary have their place in the kitchen. Fresh sprigs infuse dishes with a robust, immediate aroma, while dried rosemary offers a more concentrated flavor. Use fresh rosemary for roasts and grilled dishes, and dried rosemary for marinades and in spice blends.
- Balancing Act: Rosemary’s potent flavor can easily overwhelm dishes if used excessively. A little goes a long way, so use it sparingly, especially if you’re using dried rosemary.
- Complementary Pairings: Rosemary pairs harmoniously with a range of ingredients. It complements meats like lamb, poultry, and pork, as well as roasted vegetables, potatoes, beans, and even bread.
- Infusion Techniques: When using rosemary in soups or stews, tie the sprigs together with kitchen twine for easy removal before serving. Alternatively, you can strip the leaves from the stem and finely chop them to disperse the flavor evenly.
- Oil and Vinegar: Elevate your culinary creations by infusing olive oil or vinegar with rosemary. Place sprigs in a bottle, cover them with oil or vinegar, and let it steep for 3 to 6 weeks. The resulting infusion adds an aromatic twist to dressings, marinades, and dips.
Culinary Caution
While rosemary’s culinary potential is boundless, a few precautions can ensure you get the best out of this herb:
- Avoid Overcooking: Prolonged exposure to heat can make rosemary bitter. Add it towards the end of cooking to preserve its vibrant flavor.
- Textural Sensitivity: Rosemary’s needle-like leaves can be quite potent if left whole in a dish. To avoid an overwhelming texture, consider chopping them finely or removing the leaves before serving.
- Respect the Balance: As with any herb, balance is key. Don’t let rosemary dominate the dish; rather, let it enhance the flavors and create a harmonious blend.
With rosemary as your guide, may your kitchen become a laboratory of flavors. As you savor every bite, remember that your dish carries not just the essence of rosemary, but the embodiment of its entire alchemy.
Medicinal and Spiritual Use of Rosemary: Embracing Nature’s Gift
Our journey would be incomplete without delving deeper into Rosemary’s integrative health uses. From the world of tinctures to the soothing solace of teas, rosemary opens a gateway to a profound union of body, mind, and spirit. Here’s where the recipes from ancient wisdom intertwine with modern practices, and the spiritual essence of rosemary reveals itself.
Supplements, Tinctures, and Teas: Nurturing the Body
In the realm of herbal medicine, rosemary stands as a versatile ally, offering a myriad of health-enhancing benefits. If you are interested in experimenting with rosemary as a supplement, you can find it in pure capsule form, or as part of a combination formula.
Tinctures, prepared by extracting rosemary’s essence in alcohol or glycerin, capture its potent healing properties. These tinctures can be taken orally to support digestion, alleviate headaches, and even boost cognitive function. A few drops of rosemary tincture in water can usher in a sense of vitality and clarity, tapping into the herb’s invigorating energy.
And then there are teas, the gentle infusions that allow rosemary’s essence to slowly unfurl within us. A warm cup of rosemary tea offers more than just comfort; it provides a gentle nudge to the body’s natural healing mechanisms. Known for its anti-inflammatory properties, rosemary tea can offer relief from aches and pains, while its antioxidants combat the effects of oxidative stress. A sip of rosemary tea can be a ritual of self-care, a moment of connection with nature’s healing embrace.
Here are a few products from my botanical formulary, where you always get 25% off and free shipping over $50 (not for resale).
Flower Essences: Merging with the Ethereal
The world of flower essences is ethereal. The essence of plants are energy medicines, and reach beyond the physical, touching the very essence of our being. Rosemary’s flower essence holds within it the energetic blueprint of the herb’s essence. Just a few drops under the tongue can foster a profound shift in your energetic state, offering insights, clarity, and a sense of connection with your higher self.
Through the flower essence of rosemary, you can open yourself to its spiritual teachings. Its energetic resonance gently nudges your intuition awake, inviting you to explore the depths of your inner wisdom. Whether used in meditation, ritual, or as a daily practice, rosemary’s flower essence becomes a conduit for spiritual growth, a bridge between the earthly and the divine.
If this aspect of plants interests you, check out my Plant Initiation Weekends. These are fun shamanic journey meditative weekends held near the equinoxes & solstices.
So, What’s Next for You?
With rosemary for remembrance, may you carry forward the wisdom and wonders of this aromatic herb, learning to weave its essence into the tapestry of your life. May your path forward be graced with the aromatic grace of rosemary’s blessings.
If this article resonated, oh good! I have more! Here are a few that might interest you.
Tulsi: The Incomparable Sacred Herb
Nature’s Timekeepers: Solstice & Equinox, Breath & Circadian Rhythms


